In summary:
- Stop guessing and start collaborating with your photographer using a shared, systematic language for direction and feedback.
- Master micro-adjustments for your face and body to create a high volume of varied, usable shots, not just a few big poses.
- Learn to find and manipulate light instantly using frameworks like the “Clock Face” system to maximize every second of a shoot.
- Understand that technical perfection is the baseline; the goal is to deliver poses so strong they survive the ruthless culling process in post-production.
The sun dips below the horizon, painting the sky in fleeting shades of gold and crimson. The photographer is shouting directions, the pressure is mounting, and you feel the window for that perfect “hero shot” closing fast. In these moments, generic advice like “relax,” “be natural,” or “connect with the camera” feels not just unhelpful, but impossible. Every model has felt that panic, the fear that the magic of the moment will be lost to clumsy execution or miscommunication. The industry is built on capturing these ephemeral moments, but relies on vague, artistic instruction to do so.
But what if the secret to nailing the shot under pressure isn’t about feeling, but about technique? What if securing the hero shot is less about magic and more about a system—a shared, efficient language between you and the photographer that cuts through the chaos? This isn’t about faking it; it’s about building a professional toolkit of precise, repeatable actions. It’s about transforming yourself from a passive subject into an active, indispensable collaborator who understands the kinetic awareness and micro-geometry that turn a good photo into an iconic one.
This guide breaks down that system. We will move beyond the platitudes and into the mechanics of high-efficiency modeling. You will learn how to interpret vague directions with a concrete intensity scale, how to use a tethered screen as a real-time feedback loop, and how to perform a “face dance” of micro-expressions. We’ll cover systematic methods for finding your light instantly and maintaining character continuity across multiple locations, ensuring every frame is a contender, long after the golden hour has passed.
This article provides a structured roadmap for models who want to deliver exceptional results under pressure. The following sections break down the core technical skills needed to become a more efficient and effective collaborator on set.
Summary: How to Ensure You Get the Hero Shot Before the Light Fades?
- How to Interpret “Give Me More” Without Overacting?
- The Tethered Shoot: How to Use the Screen to Improve Your Next Frame?
- The “Face Dance”: How to Micro-Adjust Your Expression for Variety?
- Chin Down or Chin Up: How to Find Your Light Instantly?
- How to Keep the Character Alive Across 8 Different Locations?
- The “Duchenne Smile”: How to Look Genuinely Happy on Command?
- How to Create Triangles With Your Limbs for Stronger Composition?
- Why Retouchers Delete 50% of Your Best Poses During Selection?
How to Interpret “Give Me More” Without Overacting?
The phrase “Give me more!” is one of the most common yet most misunderstood directions in photography. A novice model’s instinct is to make bigger, more dramatic movements—throwing their arms wider, laughing louder, or twisting their body more forcefully. This often leads to overacting, creating images that feel forced and unnatural. For a professional, “more” rarely means more *movement*; it means more intensity. It’s a request to deepen the internal emotion and let it show through subtle, controlled changes in your expression and body language.
The key is to replace guesswork with a system. Instead of randomly escalating your energy, work with your photographer to establish a shared vocabulary for intensity. A numerical intensity scale is a highly effective tool. For example, “Level 1” could be a completely neutral, relaxed state. “Level 5” might be a pleasant, engaged look, while “Level 10” is the peak of dramatic emotion—whether it’s fierce power, ecstatic joy, or profound sorrow. This allows the director to give precise feedback like, “That was a great Level 7, now bring it down to a 5 for the next shot.”
This systematic approach trains your muscle memory and connects your physical response to a clear command. You can even link breathing patterns to these levels: slow exhales for lower intensity, and sharp inhales to evoke a more powerful, authentic physical response for the higher levels. By turning an abstract request into a concrete, scalable action, you eliminate the risk of overacting and deliver the exact level of intensity the shot requires, every single time.
The Tethered Shoot: How to Use the Screen to Improve Your Next Frame?
On a fast-paced location shoot, the tethered laptop is your most powerful ally. Many models see the screen as a tool exclusively for the photographer or client, a place where their image is judged from afar. This is a critical mistake. You must reframe the tethered screen as your real-time collaboration dashboard. It’s not a judgment panel; it’s an objective mirror that provides instant, invaluable data on what is and isn’t working. When the photographer says “hold that,” glancing at the screen allows you to see precisely which angle, expression, or posture is hitting the mark.
This immediate feedback loop is the fastest way to improve your performance frame by frame. You can instantly spot issues that are invisible from your perspective: a hand that looks awkward, a strand of hair out of place, or a shadow falling unflatteringly across your face. Instead of waiting for the photographer to diagnose the problem, you become a proactive partner in solving it. You can say, “I see my hand is creating a strange line there, let me adjust it,” saving precious seconds and demonstrating your professionalism and kinetic awareness.
This process of review and refinement turns the shoot into a dynamic dialogue rather than a one-way monologue of direction. It builds trust and efficiency, allowing you and the photographer to iterate and elevate the concept together. When both of you are looking at the same objective result, collaboration becomes seamless, and the path to the hero shot becomes exponentially shorter.
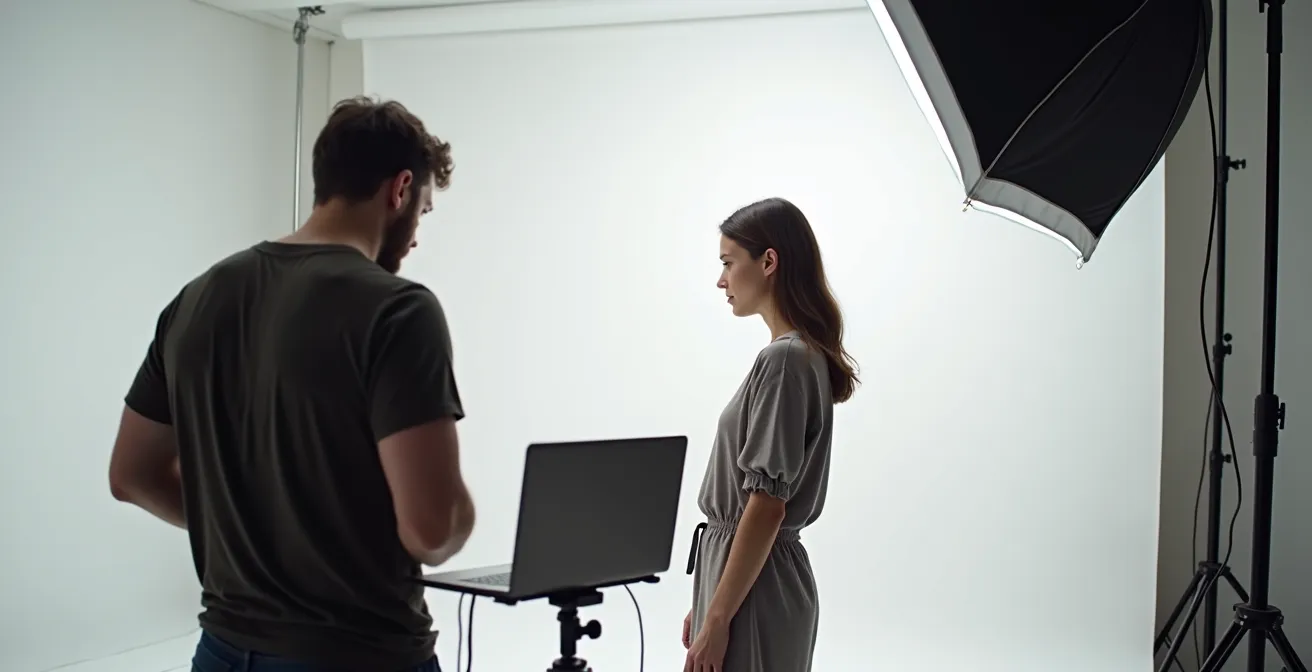
As you can see in this collaborative moment, the screen becomes a shared workspace. It allows for quick analysis and adjustment, ensuring that each subsequent shot is more informed than the last. This synergy is fundamental to achieving high-quality results when time is limited and the pressure is on. It’s about using technology not just to capture the image, but to perfect the performance that creates it.
The “Face Dance”: How to Micro-Adjust Your Expression for Variety?
When a photographer asks for variety in a close-up or beauty shot, the biggest mistake is making large, sweeping changes—turning your head dramatically from side to side or completely altering your expression. This approach is inefficient and often yields only a few usable frames. The professional technique is the “Face Dance,” a series of deliberate, minimal micro-adjustments. It’s about understanding that in a tight frame, a millimeter of movement can completely change the mood and the way light falls on your features.
The “Face Dance” is a continuous, slow-moving sequence. You might start by slightly parting your lips, then gently closing them. You can shift the intensity in your eyes without moving your head, then add a fractional tilt of your chin. Each movement should be tiny and fluid, allowing the photographer to shoot continuously and capture dozens of subtle variations. This maximizes frame efficiency, giving the retoucher a rich selection of nearly identical, yet distinct, moments to choose from. Think of it less as “posing” and more as “flowing.”
To master this, practice these transitions. For example, synchronize your blinks with the flash to avoid closed-eye shots—a common problem that ruins otherwise perfect frames. Develop a pattern of “flash, then blink” so your eyes are always open at the critical moment. Similarly, when using your hands near your face, be conscious of the details. Avoid the “claw” look by keeping your fingers relaxed and elegant. Always turn the pinky side of your hand toward the camera to create a more graceful line. These small, technical details are what separate a professional from an amateur.
Chin Down or Chin Up: How to Find Your Light Instantly?
When the light is perfect but fleeting, you don’t have time to guess where to position your face. Frantically moving your head hoping to catch the light is a waste of precious seconds. The solution is to have a systematic method for finding your light instantly. The “Clock Face” positioning system is a simple yet powerful technique that provides a shared language between you and the photographer for precise, immediate adjustments.
Imagine your head is at the center of a clock dial. “12 o’clock” is your chin straight up, “6 o’clock” is your chin tucked down to your chest, and “3” and “9 o’clock” are full profile views. While these are useful reference points, the most flattering light for fashion and portraiture is often found at the “in-between” angles. The golden angles are typically at the “2 o’clock” and “10 o’clock” positions. These three-quarter views create beautiful depth and dimension, defining the jawline and allowing for classic Rembrandt lighting (a small triangle of light on the cheek farthest from the light source).
Once you’ve mastered the main positions, you can work in “30-minute” increments for even finer control. A direction like “give me a 2:30” is a clear, technical command to slightly increase the angle from your three-quarter view. This system eliminates ambiguity and allows you to snap into the most flattering position instantly, without the photographer needing to physically adjust you. It’s a technical skill that demonstrates your expertise and maximizes the potential of every moment of good light.
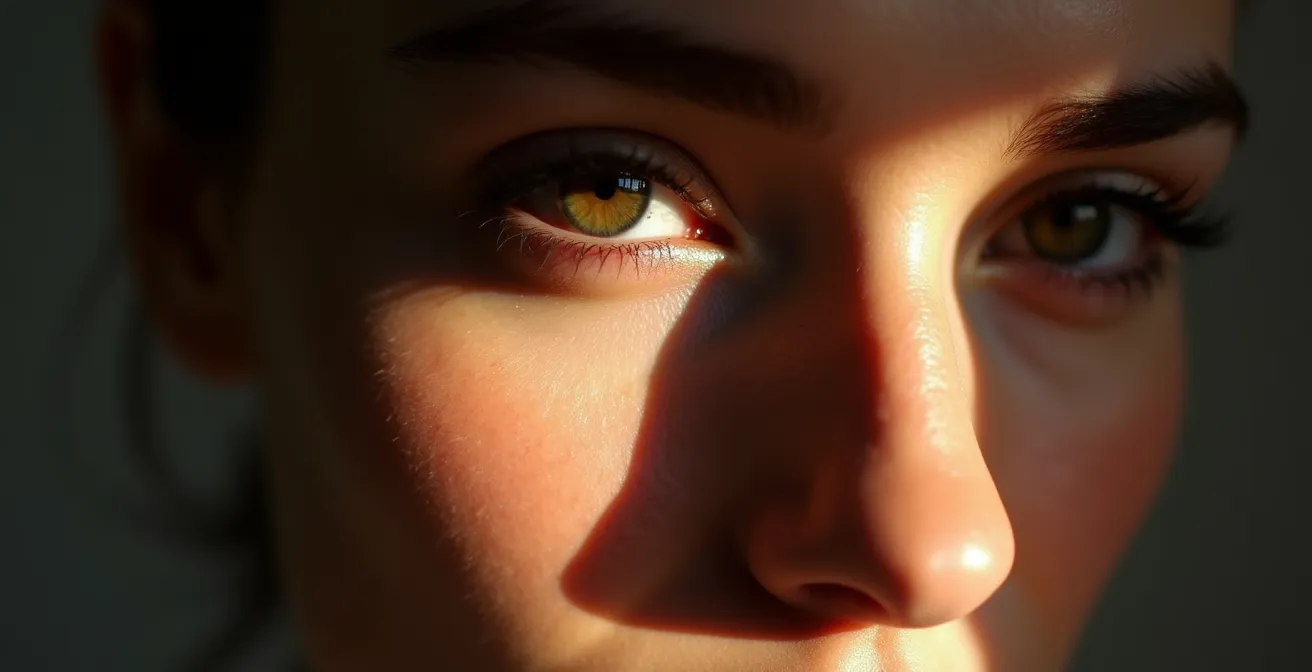
This close-up demonstrates how a subtle shift in chin angle dramatically alters how the light sculpts the face. By understanding this interplay, you can actively “hunt” for the perfect Rembrandt triangle or a striking highlight, taking control of your interaction with the light source rather than passively waiting for direction.
How to Keep the Character Alive Across 8 Different Locations?
A multi-location shoot tells a story, and you are the protagonist. The biggest challenge is maintaining the emotional and physical consistency of your character as you move between disparate environments. It’s easy for the energy to drop or the character’s essence to become diluted during the chaos of travel and setup changes. To prevent this, you need a character continuity system, a set of tools and rituals to keep the narrative thread intact from the first shot to the last.
This system begins before the shoot, by creating or studying the mood board. Understand the character’s arc: are they moving from vulnerability to strength? From joy to contemplation? This narrative journey should inform your expression and posture at each location. During the shoot, use the transition time between locations not as a break, but as a moment for character reinforcement. Talk with the photographer or director about where the character is coming from and where they are going next, both physically and emotionally.
Physical continuity cues are just as important. This could be a signature accessory that appears in every shot, a recurring gesture, or a specific way of holding your shoulders. Documenting wardrobe details with your phone ensures styling remains consistent. This meticulous attention to detail ensures that when the final images are laid out in an editorial spread, they tell a cohesive and compelling story, rather than looking like a collection of disconnected pictures. It elevates your role from simply wearing clothes to truly embodying a character.
Your Character Continuity Checklist
- Analyze the Arc: Before the shoot, study the mood board to define the character’s emotional journey across all planned locations.
- Pack a Consistency Kit: Identify and pack a few signature accessories or props that will serve as a visual anchor for the character in every setting.
- Capture a Reference Shot: At the start of each new location, take a quick reference photo on your phone to lock in the target expression and energy level.
- Use Travel for a Touch-Base: During transit between locations, discuss the character’s next “scene” with the photographer to mentally prepare.
- Maintain Physical Cues: Establish a recurring physical habit for the character (e.g., a specific hand gesture, shoulder posture) and consciously maintain it throughout the day.
The “Duchenne Smile”: How to Look Genuinely Happy on Command?
A forced smile is the fastest way to kill a shot. The camera is ruthless at detecting inauthenticity; a smile that doesn’t reach the eyes looks hollow and fake. What you’re aiming for is the “Duchenne smile,” a genuine expression of happiness that involves both the zygomatic major muscle (which raises the corners of the mouth) and the orbicularis oculi muscle (which causes crinkling around the eyes). The question is, how do you produce this on command, under pressure, for the tenth time?
You can’t simply “think happy thoughts.” The secret lies in creating the conditions for a genuine reaction, which is a collaborative effort. The photographer has a responsibility to build rapport and create a comfortable atmosphere. As a model, your job is to be open and responsive to that connection. The best images often come from genuine interaction. As the experts at Digital Photography School advise, clear communication and positive reinforcement are key. They suggest a photographer should:
At the beginning of the shoot, communicate your agenda. Then, as you work, talk to your subject. Explain what you want to see, and offer plenty of praise when you get the shot you’re after.
– Digital Photography School, Fashion Photography: 9 Tips and Techniques
This dialogue creates a positive feedback loop. When you receive specific praise, you know exactly what’s working, which builds your confidence and makes it easier to produce genuine expressions. If the photographer isn’t initiating this, you can gently prompt it by asking, “How did that last series feel?” or “Is this the energy you’re looking for?” By actively participating in building a comfortable rapport, you move from being a subject to being a partner, making authentic happiness a natural outcome of the process, not a forced performance.
How to Create Triangles With Your Limbs for Stronger Composition?
A model’s pose is fundamentally about creating compelling shapes. Flat, straight lines are often static and boring. The most effective way to add dynamism, strength, and visual interest to your poses is through the deliberate creation of triangles. This concept of micro-geometry is a cornerstone of powerful posing. Triangles guide the viewer’s eye, create a sense of balance or tension, and add professional polish to your silhouette.
Creating these shapes is a technical skill. The easiest place to start is by placing a hand on your hip, which immediately forms a “power triangle” in the negative space between your arm and torso. But it doesn’t stop there. You can create triangles with bent legs, by touching your hair to form a shape with your arm, or by crossing one leg over the other. The key is to be conscious of the negative space—the empty areas your body creates. A well-defined triangle requires clear negative space for the shape to be readable.
Different triangles convey different moods. A sharp, angular triangle from an extended elbow communicates power and confidence, ideal for editorial fashion. A softer, more curved triangle created by a hand gently resting on the collarbone can feel more approachable and serene, perfect for commercial work. Mastering a variety of these shapes gives you a versatile toolkit to fit any brief. The following table breaks down common triangle techniques and their visual impact.
| Triangle Type | Body Position | Visual Impact | Best Use Case |
|---|---|---|---|
| Power Triangle | Hand on hip, elbow out | Strong, confident | Editorial fashion, powerful poses |
| Soft Triangle | Bent arm touching hair | Feminine, approachable | Beauty shots, commercial work |
| Dynamic Triangle | One leg crossed, knee bent | Movement, energy | Active wear, street fashion |
| Nested Triangles | Multiple angles in arms and legs | Complex, artistic | High fashion editorial |
By thinking in terms of shapes and geometry rather than just “poses,” you elevate your work from simply standing in front of a camera to actively constructing a powerful image, as demonstrated by this comprehensive analysis of fashion photography techniques.
Key takeaways
- Posing under pressure is a technical system, not an abstract art; it relies on learnable frameworks for expression, lighting, and composition.
- Effective collaboration with a photographer is built on a shared, precise vocabulary (like intensity scales and clock positions) that eliminates guesswork.
- Micro-adjustments and the deliberate creation of geometric shapes (triangles) are far more powerful and efficient than large, random movements.
Why Retouchers Delete 50% of Your Best Poses During Selection?
Here is the most brutal, urgent truth of a professional photoshoot: the work isn’t over when the camera clicks. The final battle is fought on the retoucher’s screen during the culling process, and it’s a battle your poses can easily lose. You might feel you delivered a hundred perfect shots, but the reality is that a huge percentage of them will never see the light of day. It’s a stark figure, but industry professionals report that 50-60% of technically perfect fashion shots are eliminated during selection due to micro-imperfections invisible during the shoot.
What are these career-killing micro-imperfections? A slightly limp hand, an awkward bend in the wrist, a half-blink, a tensed jaw, or a pose that is 99% perfect but clashes with the background in one tiny area. While the pose might feel strong in the moment, the unblinking eye of a high-resolution screen is merciless. Retouchers and editors are looking for the single “hero shot”—the one image that is not just good, but flawless in its execution, emotion, and composition.
This is why every technique discussed in this guide is not just a “nice to have,” but a critical survival skill. The intensity scale, the clock face system, the face dance, and the creation of triangles—these are all systems designed to minimize micro-imperfections and increase your “keep rate.” Your job is not just to create beautiful poses, but to create poses so technically sound and full of subtle variety that they survive the ruthless culling process. You are competing against your own frames. The goal is to deliver a series of images so strong that the editor’s choice is not *if* there is a hero shot, but *which one* of the many you provided is the best.
Therefore, the next logical step is to stop thinking about poses as static endpoints and start treating them as a continuous flow of micro-adjusted, technically-sound options. Your goal is to deliver such a high volume of quality frames that you make the retoucher’s selection process difficult for all the right reasons.