The frustration of vague direction like “be more water” stems from a misunderstanding: your job isn’t to guess, but to perform a physical translation of an emotional or textural concept.
- Abstract instructions are invitations to a creative dialogue, not tests with a single right answer.
- True collaboration begins when you shift from being a passive subject to an active interpreter of the visual language.
Recommendation: Stop trying to find the “perfect pose” and start offering physical interpretations of the director’s language, turning abstract feedback into a collaborative process.
“Be more water.” “Give me a feeling of quiet nostalgia.” “I need this to feel… bluer.” If you’re a model, you’ve heard them all. These abstract instructions from an art director can be a source of immense frustration, leaving you feeling adrift in a sea of creative ambiguity. The common advice is to simply “communicate more” or “be confident,” but this fails to address the fundamental challenge. It’s not about a lack of confidence; it’s about the lack of a shared language. You’re trying to build a sculpture without knowing if you should be using clay or marble.
The secret doesn’t lie in practicing more generic poses in the mirror or second-guessing the director’s intent. The breakthrough happens when you reframe your role entirely. You are not just a subject to be positioned; you are a movement artist, a specialist in physical translation. Your body is the instrument that turns the director’s abstract emotional score into a visible, tangible performance for the camera. The mood board isn’t just a collection of pretty pictures; it’s a vocabulary of emotion and texture waiting to be decoded.
This shift in perspective is the key to unlocking a deeper level of creativity and collaboration on set. Instead of asking “What do you want?”, you begin to ask, “How can we physically express this idea together?”. This guide is built on that principle. We will deconstruct the process of interpretation, moving from decoding visual cues and asking smarter questions to embodying complex concepts and becoming an indispensable creative partner. You’ll learn to speak the non-verbal language of the shoot, transforming vague notes into powerful, intentional, and unforgettable images.
This article provides a complete framework for this translation process. We’ll explore how to read a mood board for its emotional undertones, how to clarify direction without sounding difficult, and how to use your physicality to tell a story, even within the constraints of restrictive garments. Let’s begin.
Summary: The Model’s Handbook for Interpreting Creative Vision
- Color Palettes and Textures: What the Mood Board Tells You About the Emotion?
- How to Ask “What Do You Mean?” Without Sounding Unprofessional?
- When the Concept Changes Mid-Shoot: How to Pivot Your Energy Instantly?
- Why You Should Ask to See the Layout Sketch Before Posing?
- How to Become the Art Director’s Muse for Future Projects?
- How to Pose in Restrictive Couture Garments Without Looking Stiff?
- Pinterest vs. Instagram: How to Build a Mood Board That Communicates Vision?
- How to Create Dynamic Shapes Using Negative Space in Fashion Photography?
Color Palettes and Textures: What the Mood Board Tells You About the Emotion?
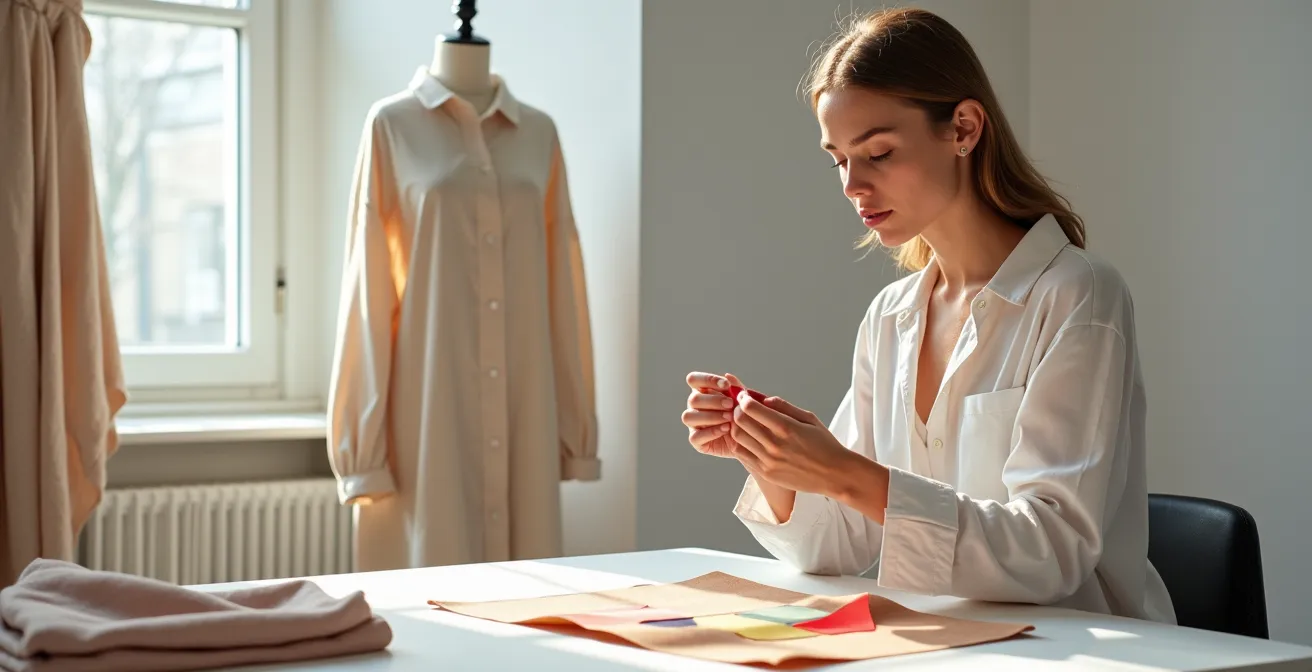
The mood board is your script. Before you even step in front of the camera, it offers a rich vocabulary of feeling and movement. Most models look at a mood board for pose ideas, but a movement director sees it as a sensory guide. The key is to stop looking at the ‘what’ (a person in a field) and start analyzing the ‘how’ (the soft, golden light; the rough texture of the coat; the cool blue of the sky). This is the foundation of physical translation. You are decoding the emotional temperature and textural language of the shoot.
Is the palette dominated by warm tones like terracotta and ochre? This suggests a grounded, earthy energy. Your movements might become more deliberate, your connection to the floor stronger. Conversely, a palette of cool blues and silvers might call for a more ethereal, floating quality. The textures are just as important. A mood board filled with images of silk and water implies fluidity and continuous, flowing shapes. One featuring tweed, concrete, and brutalist architecture demands a more angular, structured, and contained physicality. Professional models understand that heavy velvets require grounded, deliberate poses, while light chiffons demand ethereal, floating movements. It’s about letting the material inform your body language.
By analyzing these elements, you arrive on set already speaking the visual language of the project. You’ve moved beyond mimicking poses and have begun the work of embodying an atmosphere. This proactive analysis shows a level of preparation that immediately signals you are a serious creative partner, not just a passive subject.
Action Plan: Decoding a Mood Board for Emotional Cues
- Identify Color Temperature: First, pinpoint the dominant color temperature (warm vs. cool). This establishes the baseline emotional energy you need to project.
- Map Textures to Movement: Associate each key texture with a movement quality. For example, map silk to fluid/continuous movements and tweed to angular/structured ones.
- Analyze Juxtapositions: Look at how images are placed next to each other. This can reveal a narrative flow or suggest emotional contrasts you’ll need to transition between.
- Create Physical Anchors: Start building a physical vocabulary by associating each primary color with a specific level of muscle tension in your body.
- Practice Transitions: Use your breath to practice moving between the “weight” of different textures, embodying the shift from a heavy wool to a light cotton.
This homework transforms the mood board from a static collection of images into a dynamic blueprint for your performance.
How to Ask “What Do You Mean?” Without Sounding Unprofessional?
There will always be moments when the direction, even with a great mood board, remains elusive. The fear of sounding inexperienced or “difficult” often prevents models from asking for clarification. However, the right kind of question doesn’t expose a weakness; it demonstrates a commitment to the creative process. The goal is to shift from a passive question (“What do you mean?”) to an active, collaborative one. This is the art of creative dialogue.
Instead of placing the burden of explanation back on the director, offer them options. You are turning an abstract concept into a multiple-choice question they can easily answer. This technique positions you as a problem-solver who is actively engaged in building the image. For example, instead of saying “I don’t get it,” you can physically demonstrate two quick options: “Is the energy more like this… or closer to this?” This gives the director a concrete visual to react to, streamlining communication and saving valuable time on set.

This approach is built on offering concrete interpretations. Frame your questions to show you’re thinking collaboratively about the final image. A simple script change from “What do you want?” to “How can we best capture that feeling together?” transforms the entire dynamic. It shows you respect their vision and are a partner in realizing it. As one professional guide suggests, the key is to be specific in your options:
When you say ‘ethereal,’ are we thinking more of a delicate, floating quality or a ghostly, untouchable one?
– Professional Model Communication Technique, Fashion Photography Communication Guide
By offering choices—mysterious-distant or mysterious-inviting?—you are not just asking for direction; you are contributing to it, proving your value as a thinking, interpretive artist.
When the Concept Changes Mid-Shoot: How to Pivot Your Energy Instantly?
A fashion shoot is a living organism; concepts evolve, light changes, and a new garment can alter the entire narrative. The ability to pivot your energy and emotional state instantly is the hallmark of a top-tier model. Awkward, slow transitions break the creative flow and cost the production time and momentum. The key to seamless pivoting isn’t just “getting into character” faster; it’s a trained, physiological skill. Your body must be primed to shift gears without hesitation.
One of the most effective tools for this is a technique known as kinesthetic anchoring. This involves pre-associating specific physical triggers with distinct emotional states during your personal practice. For example, you might associate the feeling of power with a subtly clenched fist and a lowered center of gravity. Serenity could be anchored to the sensation of open palms and a released jaw. When a director calls for a sudden shift from powerful to serene, you don’t have to “think” your way into the new mood; you simply activate the physical anchor. This allows models to switch states in under five seconds, maintaining the shoot’s crucial momentum.
This physical training is complemented by mental preparation. On set, a quick mental reset can make all the difference. When a concept changes, take one deep, intentional breath. Use that moment to consciously release the previous character and create a neutral space for the new direction. This isn’t wasted time; it’s an investment in the quality of the next shot. In fact, research on professional modeling techniques shows that a simple 30-second mindfulness reset reduces transition awkwardness by 75%. This brief pause allows you to shed the old energy and fully commit to the new one, ensuring your performance remains authentic and connected.
By combining physical anchors with mindful resets, you transform from someone who needs to be warmed up to a new idea into a responsive instrument ready to play any note required.
Why You Should Ask to See the Layout Sketch Before Posing?
Many models see their job as complete once the photo is taken. However, an elite model understands that the image is just one component of a larger design. Magazine spreads, web banners, and advertisements almost always incorporate text, logos, or other graphic elements. Posing without an awareness of this final layout is like acting in a scene without knowing where the other actors will be standing. It leads to beautiful but often unusable shots where a hand covers the space for a headline or a dynamic pose is lost to a necessary crop.
Requesting to see the layout sketch is not an overstep; it’s a mark of professionalism that demonstrates your investment in the final product. It immediately elevates you from “subject” to “creative partner.” When you understand where the text will be, you can use your body to frame that space, creating a more harmonious and effective final composition. You begin to make strategic positioning choices, leaving clean areas for typography and ensuring your most expressive gestures fall in zones that won’t be cropped. This simple act of inquiry can dramatically increase your value on set.
The difference is stark, as shown by data from professional photography workflows. Knowing the layout transforms your contribution from a game of chance to a calculated collaboration. The following breakdown illustrates the impact of this knowledge.
This table, based on an analysis of studio photography workflows, highlights the tangible benefits of posing with layout awareness.
| Aspect | Without Layout | With Layout |
|---|---|---|
| Typography Awareness | Random hand/face placement | Strategic positioning around text areas |
| Composition Success Rate | 40-50% usable shots | 75-85% usable shots |
| Post-Production Time | 2-3 hours extensive cropping | 30-45 minutes minor adjustments |
| Creative Collaboration | Model as subject only | Model as creative partner |
As one Fashion Photography Director noted, this awareness has a direct impact on the entire post-production pipeline. As they explain in a professional photography workflow guide, “A model who understands layout provides cleaner shots, reduces the need for extensive cropping in post-production, and makes the graphic designer’s job easier.”
Ultimately, seeing the layout isn’t about restricting your movement; it’s about making your movement more intelligent and impactful.
How to Become the Art Director’s Muse for Future Projects?
Getting booked for a shoot is a goal. Getting re-booked is a career. The difference lies in becoming a muse—a creative partner the art director trusts and is inspired by. This status isn’t achieved by having the “right look”; it’s earned by demonstrating a deep understanding of the creative process and actively contributing to it. It’s about being the model who not only delivers on the initial concept but elevates it.
The work to become a muse continues long after the shoot wraps. A simple, professional follow-up email within 48 hours, referencing a specific creative breakthrough from the day (“I really enjoyed exploring that ‘fractured glass’ concept we discovered”), reinforces your engagement and intellectual investment. This is also where you plant seeds for future collaboration. Maintain a private Pinterest board not of generic poses, but of unique concepts, artistic references, and movement ideas. Sharing this with a director quarterly shows your ongoing creative development and initiative beyond paid time.
This proactive, collaborative approach has a significant, measurable impact on a model’s career trajectory. It’s the difference between being a transient face and a valued partner. In fact, industry data reveals that models who actively contribute creative input have 3x higher rebooking rates. They are seen as assets who can help solve creative problems, not just fulfill a casting brief. Document the moments when you successfully decoded a vague instruction; these “translation moments” become your unique value proposition. By offering to test new lighting or concepts during downtime, you demonstrate a passion for the craft itself, solidifying the director’s impression of you as a true collaborator.
Ultimately, becoming a muse is about proving that you are not just part of the image, but part of the imagination behind it.
How to Pose in Restrictive Couture Garments Without Looking Stiff?
Posing in a voluminous ball gown or a sharply tailored, restrictive piece of couture presents a unique challenge: how do you convey emotion and life when your movement is severely limited? The common mistake is to fight against the garment, resulting in a stiff, doll-like appearance. The secret is to work *with* the restriction. Instead of focusing on what you can’t do, you must master the art of what you *can* do. This means shifting your expressive focus from large, dynamic movements to powerful, controlled micro-movements.
The “Isolate and Articulate” method is key here. First, identify which parts of your body retain some mobility. It might only be your neck, your eyes, your fingers, or even just your breath. Then, channel the entire story and emotion of the pose through those isolated points. A slight, deliberate shift of the eyes can convey more narrative than a full-body turn. A single, curled finger can express tension or vulnerability. The garment becomes your second skin, a beautiful cage, and your performance is the life stirring within it. It’s a testament to your skill when you can project strength and boldness through such contained energy.
Breathing is your most powerful tool in this context. While you can’t bend or twist, you can use your breath to create subtle shifts in volume and posture that bring the garment to life. Diaphragmatic breathing, where the breath originates deep in the belly, can create a gentle expansion in the torso without breaking the garment’s clean lines. A controlled, slow exhale can release tension in the shoulders and neck while you maintain a structured pose. Timing a quiet inhale with the click of the shutter adds a spark of presence and vitality, preventing the image from feeling static. You’re not just wearing the fashion; you are animating it from within.
By isolating mobile joints and articulating through breath, you prove that the most powerful stories are often told in the quietest gestures.
Pinterest vs. Instagram: How to Build a Mood Board That Communicates Vision?
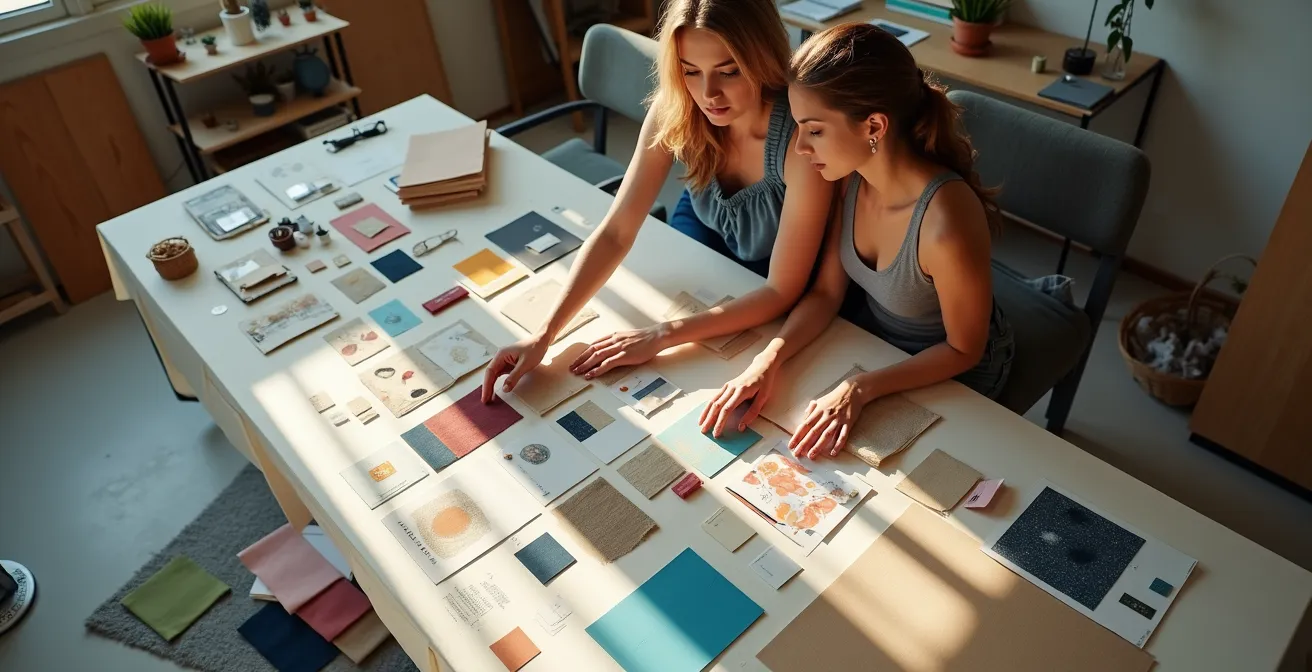
As an interpretive artist, you are not only consuming mood boards but creating them. Building your own library of references is crucial for developing your unique physical vocabulary and for communicating your own vision when collaborating with photographers or art directors. However, the platform you choose to build this library on drastically affects its utility. Instagram and Pinterest, while both visual, serve fundamentally different purposes for a model’s professional development.
Instagram is about the now. Its algorithm favors current trends, specific popular poses, and the work of active photographers. It’s an excellent tool for keeping your finger on the pulse of the industry and for finding direct inspiration for a commercial shoot. You can save posts into collections to reference specific posing or lighting ideas. However, its organizational structure is limited, and its focus is more on the final, polished image than on the abstract concepts behind it.
Pinterest, on the other hand, is a tool for deep conceptual exploration. Its strength lies in its ability to connect disparate visual ideas. You can create unlimited, highly-themed boards that mix fashion photography with art history, architectural details, natural textures, and color theory. This is where you build the “why” behind your poses. The platform’s visual discovery algorithm helps you find unexpected connections, pushing your creative boundaries. It is the ideal space for developing abstract mood and understanding the historical context of certain aesthetics. This table breaks down the core differences:
| Feature | ||
|---|---|---|
| Best For | Abstract concepts, mood, art history | Specific poses, current trends |
| Organization | Unlimited themed boards | Saved collections (limited) |
| Discovery Algorithm | Visual similarity search | Hashtag and account-based |
| Annotation | Board descriptions only | Personal notes in saved posts |
| Sharing with Team | Collaborative boards | Direct message collections |
An expert in visual communication once said it perfectly:
A collection of images is just data; insight comes from annotation.
– Creative Direction Expert, Visual Communication in Fashion
Use Instagram for homework on current trends, but use Pinterest to build the soul of your work. One informs your next job; the other builds your entire career.
Key Takeaways
- Vague direction is an invitation to collaborate, not a test. Your role is to translate, not guess.
- Mastering micro-movements and breathing techniques allows you to convey powerful emotion even in restrictive garments.
- Understanding the final layout and using negative space strategically elevates you from a subject to a creative partner in composition.
How to Create Dynamic Shapes Using Negative Space in Fashion Photography?
The most advanced models understand that what they create is not just a pose, but a shape. The story is told not only by the body itself, but by the spaces the body carves out of the air around it. This is the concept of negative space—the empty areas around and between parts of the subject. Mastering its use is like learning the grammar of visual composition. It allows you to guide the viewer’s eye, create dynamic tension, and add a layer of artistic sophistication to your work.
In fashion photography, where the goal is often to showcase both the garment and the subject, a compelling pose is one that creates interesting shapes. Photographers draw inspiration from artists like Henri Matisse, who used empty space to define and emphasize his forms. By studying these principles, you learn how an extended arm, a bent knee, or the space between the chin and shoulder can create compelling voids that make an image more engaging. An asymmetrical negative space, for example, can create a sense of movement and dynamic tension, while a symmetrical, contained space can feel more serene and balanced.

Developing this awareness requires specific practice. A simple drill is to work against a plain wall or on the floor. The goal is not to create “pretty” poses, but to consciously create distinct geometric shapes—triangles, diamonds, curves—with your limbs and torso. Use a mirror or your phone camera, but train your eye to look at the shapes of the *background* you are creating, not just your own silhouette. Document the shapes that feel most powerful and add them to your personal pose library. This practice builds a deep, intuitive understanding of spatial grammar that you can deploy instantly on set.
As one guide on the genre explains, this skill is paramount because in fashion, the poses must work to showcase the garments and accessories as well as the subject. By mastering negative space, you are not just modeling a garment; you are composing a work of art in which the garment is a central element.
Embrace this new mindset, transforming every vague instruction into an opportunity for physical translation, and you will not only build a successful career but become an essential part of the creative process itself.