
The last-minute panic to get ready for an unexpected booking is a model’s worst enemy. Instead of relying on frantic, overnight fixes, the key to being consistently camera-ready is a disciplined, 15-minute daily “micro-maintenance” system. This approach focuses on systematically preventing the small, overlooked issues—from ashy elbows to a messy digital presence—that can make or break a job, ensuring you’re prepared for any opportunity, anytime.
That sudden call from your agent: “Can you be at a casting in two hours?” For many models, this triggers a frantic scramble. A desperate look in the mirror reveals a chipped manicure, dry skin, or roots that suddenly seem glaringly obvious. The standard advice often revolves around last-minute fixes—intensive masks, emergency appointments, and quick-fix products. But what if the secret to being permanently prepared isn’t about reacting to chaos, but preventing it altogether?
The real pros know that being “camera-ready” is not a state you achieve; it’s a state you maintain. It’s about building a foundation of preparedness so strong that a last-minute call is an opportunity, not a crisis. This philosophy moves beyond generic wellness tips like “get more sleep” and focuses on a targeted, daily system of micro-maintenance. It’s a non-negotiable routine that addresses the small, professional details that clients and photographers notice immediately.
This guide breaks down that exact system. We will explore the non-obvious daily habits, from applying sunscreen indoors to auditing your own Instagram grid as if it were a composite card. By embracing this 15-minute daily commitment, you shift from a cycle of stressful preparation to a constant state of professional readiness, 365 days a year.
In this article, we’ll detail the essential components of this daily maintenance system. Each section is designed as a small, actionable step you can integrate into your routine to build a foundation of constant preparedness.
Summary: A Model’s Guide to Staying Camera-Ready Daily
- SPF 50 Indoors: Why You Need Sunscreen Even When You Are Not at the Beach?
- Ashy Knees and Elbows: The Body Care Step Most Models Forget?
- Nude or Clear: The Only Manicure That Works for Last-Minute Bookings?
- Strips vs. Professional: How to Whiten Teeth Without Destroying Enamel?
- Laser vs. Waxing: Which Hair Removal Method Saves Money Long-Term?
- Hands, Feet, and Lips: Do You Have What It Takes to Be a Parts Model?
- Oxygen Infusion: Why It’s the Red Carpet Secret for Plump Skin?
- Instagram as a Composite Card: How to Audit Your Profile for Clients?
SPF 50 Indoors: Why You Need Sunscreen Even When You Are Not at the Beach?
Thinking you’re safe from sun damage just because you’re inside is a common and costly mistake. While windows in your home or car block most UVB rays (the ones that cause sunburn), they offer little protection against UVA rays. These are the rays responsible for premature aging, fine lines, and collagen degradation—all career-killers for a model whose skin is their asset. Consistent, low-level exposure day after day, even from sitting near a window, adds up to significant long-term damage.
The daily application of a broad-spectrum sunscreen is the single most effective anti-aging step you can take. It’s not a “beach day” product; it’s a “every day” essential. This simple act is a core pillar of your micro-maintenance routine, preventing damage before it ever has a chance to form. This preventative measure is far more effective and cheaper than trying to correct sunspots and wrinkles later with expensive treatments.
Furthermore, don’t assume one morning application lasts all day, even without direct sun. A study on sunscreen persistence in indoor workers revealed that even in an office environment, the effectiveness of sunscreen diminishes over time. The research showed that sunscreen saw a peak reduction of 16.3% after just two hours and a total reduction of over 28% by the end of an eight-hour day. This proves that reapplication or using a robust, long-lasting formula is crucial, even when you’re not outside.
Making SPF 50 a non-negotiable part of your morning routine, regardless of your plans, is the ultimate long-term investment in your career’s longevity.
Ashy Knees and Elbows: The Body Care Step Most Models Forget?
In the rush to perfect facial skincare, models often neglect key areas of the body that are highly visible on camera. Ashy, dry, or discolored knees and elbows can cheapen an entire look and create unnecessary work for retouchers. These areas have thicker skin and fewer oil glands, making them prone to dryness and a buildup of dead skin cells. Simply slathering on a basic lotion is often not enough to penetrate this tough skin, leading to that dreaded gray, flaky appearance under studio lighting.
A targeted “micro-maintenance” strategy for these spots is essential for a polished, head-to-toe finish. The solution is not just about moisturizing; it’s a systematic approach of exfoliating, hydrating, and sealing. This process removes the dead skin, allows moisture to penetrate deeply, and then locks it in for lasting smoothness and an even skin tone. This small daily or every-other-day ritual makes a massive difference in your overall presentation.
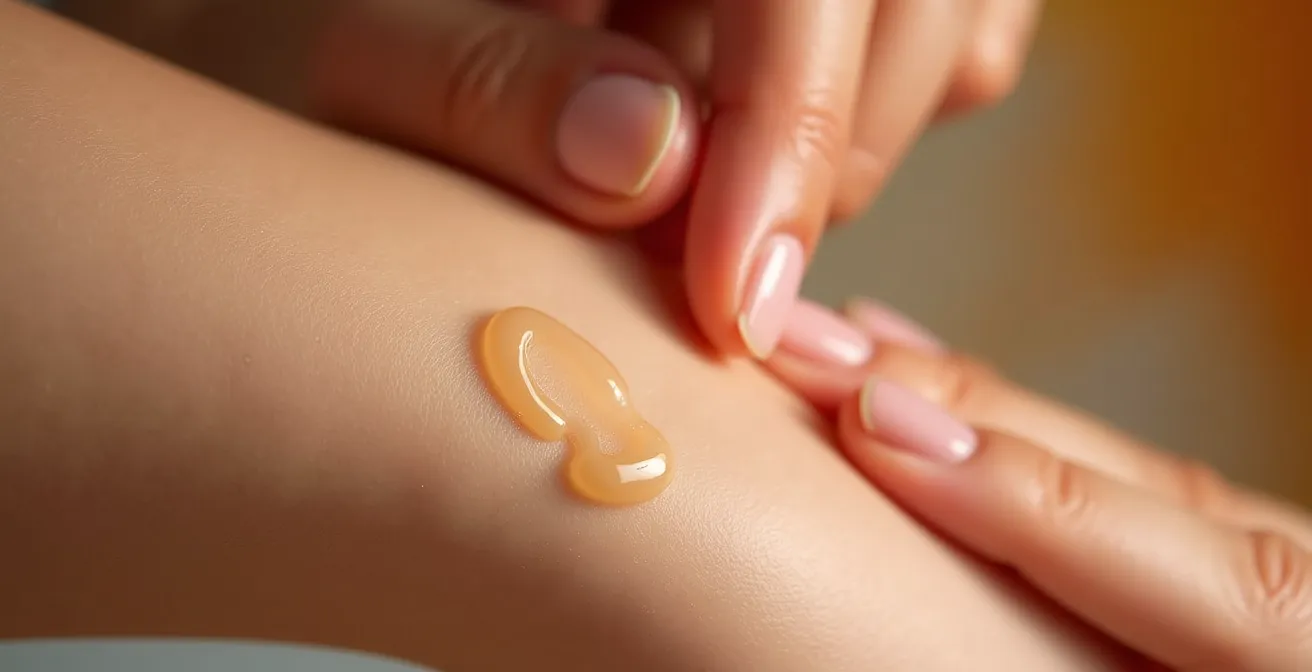
As seen in the texture of truly cared-for skin, the goal is a smooth, supple surface that reflects light evenly. A simple yet highly effective system ensures your knees and elbows are always ready for their close-up. Implement this 3-step process before bed for overnight repair:
- Exfoliate: Apply a chemical exfoliant with glycolic or lactic acid to target areas. Leave it on for 60 seconds before rinsing to dissolve dead skin cells.
- Hydrate: While the skin is still slightly damp, layer on a hyaluronic acid serum. Damp skin maximizes absorption, drawing moisture deep into the tissue.
- Seal: Immediately follow with an occlusive balm containing ingredients like ceramides or petroleum jelly. This creates a protective barrier, preventing moisture loss and sealing in the hydration overnight.
This quick, three-part system takes less than two minutes but ensures that no part of your body is an afterthought. It’s a prime example of proactive care that prevents a common on-set issue.
Nude or Clear: The Only Manicure That Works for Last-Minute Bookings?
A bold, colorful manicure might express your personal style, but it can be a major liability for a working model. A last-minute casting for a jewelry campaign that requires clean, natural hands could be lost simply because your neon green nails clash with the client’s aesthetic. Removing dark or glittery polish in a hurry can leave stains and residue, looking unprofessional. The solution is to adopt a “zero-friction” manicure as your default state: a look that works for any potential job, at any time.
This means sticking to a palette of sheer nudes, pale pinks, or a simple clear gloss. These options are universally accepted, look clean and polished, and never distract from the product or clothing being showcased. A well-maintained natural nail is often the best choice, signaling to clients that you are a versatile and prepared professional. It’s a small detail that communicates you understand the business of modeling: you are a canvas, not the painting.
When choosing your polish type, the decision between gel and regular polish involves a trade-off between longevity and flexibility. While gel polish offers weeks of chip-free wear, its difficult and time-consuming removal process can be a problem if a client specifically requests completely bare nails. Regular polish offers the ultimate flexibility. A comparative analysis shows this trade-off clearly, as highlighted by insights from industry resources for models.
| Factor | Gel Polish | Regular Polish |
|---|---|---|
| Longevity | 2-3 weeks | 3-5 days |
| Removal Time | 15-20 minutes | 2-3 minutes |
| Nail Damage Risk | Moderate to High | Minimal |
| Cost per Application | $35-60 | $15-25 |
| Quick Change Ability | Difficult | Easy |
Ultimately, for a model who needs to be ready for anything, the minimal risk and easy-change ability of a high-quality regular polish in a nude or clear shade makes it the superior professional choice for daily readiness.
Strips vs. Professional: How to Whiten Teeth Without Destroying Enamel?
A bright, confident smile is a non-negotiable asset for any model. However, the pursuit of pearly whites can easily lead to damaged enamel and extreme sensitivity if not approached correctly. The key is to understand the difference between maintenance and intensive treatment. Aggressive, high-concentration professional treatments can provide dramatic results, but they can also strip enamel and should be used sparingly, well in advance of any important job. For consistent, year-round readiness, a gentler approach is required.
The core of a “camera-ready” dental routine is maintenance over intensity. This involves using at-home whitening strips with a lower concentration of peroxide. While the results are more gradual, they are also much safer for your enamel in the long run. Using strips for a short period (e.g., 30 minutes) every few weeks is a sustainable way to lift surface stains from coffee, tea, or wine without causing the painful sensitivity that can make a long day on set unbearable.

Your daily oral care setup should be focused on preservation and gentle enhancement. This includes using a whitening toothpaste to manage surface stains daily and being diligent with flossing. Think of your teeth like your skin: they need a consistent, gentle routine, not a series of harsh, reactive treatments. This micro-maintenance approach ensures your smile is always bright and healthy, without risking the long-term health of your teeth.
When choosing a product, look for brands accepted by dental associations and be sure to follow the instructions precisely. Overusing even low-concentration strips can lead to problems. The goal is a naturally bright smile, not an artificially stark white that looks out of place and can damage your enamel permanently.
By integrating gentle whitening maintenance into your routine, you avoid the painful, last-minute need for a quick fix and keep your smile effortlessly ready for its close-up.
Laser vs. Waxing: Which Hair Removal Method Saves Money Long-Term?
Smooth, hair-free skin is a baseline requirement for most modeling jobs, especially swimwear, lingerie, and beauty campaigns. The constant cycle of shaving or waxing is not only time-consuming but also a significant recurring expense. Shaving can cause razor burn and stubble within a day, while waxing requires consistent appointments and the uncomfortable “grow-out” phase. For a model needing to be ready at a moment’s notice, these methods are inefficient and unreliable. The real question is about the long-term investment: which method provides permanent readiness and financial savings?
While the upfront cost of laser hair removal can seem steep, a long-term analysis reveals it to be the more economical and efficient choice. Waxing is a perpetual expense. When you calculate the cost of monthly appointments over a modeling career, the numbers are staggering. In fact, some analyses show that the lifetime cost of hair removal can be a major financial drain, with some studies reporting women may spend as much as $23,000 on waxing and other temporary methods.
In contrast, laser hair removal is a finite expense. After a series of 6-8 sessions, most people achieve a significant, often permanent, reduction in hair growth. While occasional touch-up sessions may be needed every year or two, the relentless cycle of monthly appointments is broken. This not only saves thousands of dollars over the long term but, more importantly, it saves invaluable time and eliminates the stress of last-minute hair removal.
The “readiness” factor is the biggest advantage. With laser hair removal, you are always smooth and prepared for a last-minute swimsuit casting or lingerie shoot. There is no need to check for stubble or worry if you have time to book a wax. This is the ultimate form of micro-maintenance: a one-time series of treatments that pays dividends in preparedness for years to come.
Investing in laser hair removal is investing in your own peace of mind and professional readiness, freeing you from a costly and time-consuming maintenance cycle forever.
Hands, Feet, and Lips: Do You Have What It Takes to Be a Parts Model?
Whether you aim to be a parts model or not, your hands, feet, and lips are under constant scrutiny during castings and shoots. A beautiful face can be undermined by ragged cuticles, dry lips, or callused feet in a shoe shot. These are the “fine print” of your overall presentation, and mastering their care is a hallmark of a true professional. As modeling legend Maye Musk notes, longevity in the industry is directly tied to this level of diligence.
You really can’t last that long as a model unless you look after your skin.
– Maye Musk, What a Model’s Skin-Care Routine Actually Looks Like
This principle extends to every part of you. The key is to perform a daily “micro-damage audit” to catch and correct minor issues before they become noticeable problems. This is not about spending hours on grooming; it’s about a quick, 60-second scan that becomes an automatic part of your routine, just like brushing your teeth. It’s about cultivating an eye for the details that casting directors see.
This daily audit trains you to think like a client and maintain a constant state of polish. It’s the difference between looking good and looking like a professional who respects their craft. Use this simple checklist every morning or evening to ensure you are always ready for an unexpected close-up.
Your Action Plan: The 60-Second Micro-Damage Audit
- Nails: Check fingernails for any chips, breaks, or uneven edges. A quick file can fix a minor snag before it becomes a full break.
- Cuticles: Inspect cuticles for any hangnails or dry patches. Apply a drop of cuticle oil immediately to prevent tearing.
- Hands: Examine the backs of your hands and knuckles for cuts, scratches, or excessive dryness. Keep a rich hand cream accessible at all times.
- Lips: Look for any dry or cracked areas on your lips. Exfoliate gently with a soft toothbrush and apply a thick lip balm.
- Feet: Check your feet for calluses, dry heels, or any pedicure issues if you’re wearing open-toed shoes. A quick pass with a foot file can maintain smoothness.
By making this audit a non-negotiable part of your day, you ensure that every part of you is consistently cared for and ready for professional evaluation.
Oxygen Infusion: Why It’s the Red Carpet Secret for Plump Skin?
Even with a perfect daily routine, there are times when you need an extra boost of radiance right before a major event, photoshoot, or red carpet appearance. This is where treatments with zero downtime and instant results become invaluable. The oxygen infusion facial is a long-held secret of celebrity facialists for exactly this reason. It delivers immediate, visible plumping and glowing results without the redness, peeling, or recovery time associated with more aggressive procedures.
The treatment works by using a machine to spray a stream of highly concentrated oxygen molecules, infused with skin-specific serums, onto the epidermis. Common serums used include hyaluronic acid for hydration, vitamins for antioxidant protection, and botanical extracts for calming the skin. The high-pressure stream helps the skin absorb these active ingredients more effectively, resulting in a face that looks instantly more hydrated, dewy, and refreshed.

The immediate effect is a visible reduction in the appearance of fine lines and a smoother, more luminous complexion, making it the perfect pre-event prep. It provides that “lit from within” glow that is so difficult to replicate with makeup alone. While not a permanent fix for deeper skin concerns, it is an incredibly effective tool for short-term, high-impact results. It’s the perfect final touch on a well-maintained canvas.
For models, having access to or knowledge of such a treatment is a strategic advantage. It’s the ideal solution for the day of a big shoot to ensure your skin is at its absolute best. It complements your daily micro-maintenance routine by providing a peak-performance boost precisely when you need it most, ensuring your skin is perfectly plump and ready for the camera.
While not a daily necessity, knowing when to deploy a treatment like an oxygen facial is part of a smart, strategic approach to career management.
Key Takeaways
- Maintenance Over Repair: True readiness comes from a consistent, daily micro-maintenance routine, not last-minute fixes.
- Audit the Details: Success lies in the small, often-overlooked areas like cuticles, elbows, and teeth that clients notice first.
- Digital Polish is Essential: Your social media profile is your modern composite card and requires the same level of professional auditing as your physical appearance.
Instagram as a Composite Card: How to Audit Your Profile for Clients?
In today’s digital-first world, your Instagram profile is often the first place a potential client or casting director will look. It has become a living, breathing composite card and portfolio. A messy, unprofessional, or inconsistent feed can cost you a job before you even get a chance to walk into the room. Being “camera-ready” now extends to your digital presence. Your grid must reflect the same level of polish and professionalism as your physical appearance.
This requires a shift in mindset: your Instagram is not just a personal social account; it’s a critical career tool. It needs to be curated and audited with the same rigor you apply to your skin or nails. This means ensuring your bio is up-to-date with correct measurements and agent contact information. It means your first nine photos—the ones visible at a glance—showcase your versatility, including a clear headshot, a full-body shot, and examples of your work or personal style that aligns with your target brands.
Part of your daily micro-maintenance routine should include a quick “digital tidy-up.” This involves checking photo tags to ensure they are professional, monitoring comments for anything inappropriate, and archiving old story highlights that no longer reflect your current look. It’s about controlling your narrative and presenting a cohesive, professional brand at all times. This simple, 5-minute routine can prevent a bad tag or an old, unprofessional photo from sabotaging a new opportunity.
Follow this quick routine to keep your digital composite card in top shape:
- Archive Outdated Stories: Remove any story highlights that don’t align with the professional image you want to project now.
- Review Photo Tags: Check photos you’ve been tagged in. Hide or remove any that are unprofessional or unflattering.
- Moderate Comments: Delete or hide any inappropriate or spammy comments on your recent posts to maintain a clean space.
- Update Bio: Ensure your bio contains current measurements, location, and clear contact information for your representation.
- Audit the Grid: Look at your top nine posts. Do they show your range? Is your brand clear? Ensure they represent the best of “you” as a model.
By treating your Instagram profile with this level of professional care, you complete the 360-degree view of a model who is truly and completely “camera-ready.” Start building your 15-minute micro-maintenance routine today to ensure your next booking is met with confidence, not panic.