Contrary to popular belief, arriving “bare-faced” is not enough; it’s the disciplined 24-hour protocol before you arrive that dictates the quality and efficiency of a photoshoot.
- Your skin is not a personal feature, but a professional canvas. Arriving with irritated or poorly prepped skin is a costly liability for the entire production team.
- The makeup artist’s kit is a sanitized, high-investment environment. Respecting their tools and process is a non-negotiable part of a model’s job.
Recommendation: Internalize a strict, non-negotiable skin preparation and on-set etiquette protocol. Treat your skin with the same professionalism as you treat your portfolio—it is your most valuable collaborative asset.
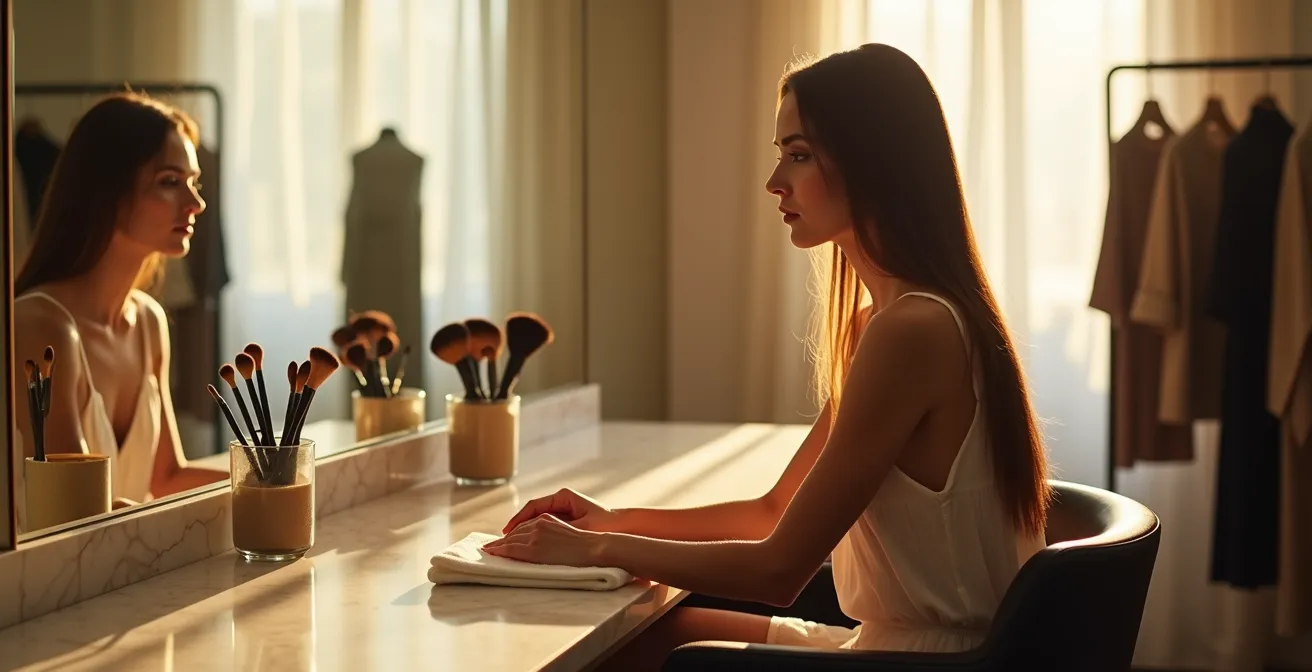
In my years as a makeup artist, I’ve seen it all. Models who are the epitome of professionalism can unknowingly sabotage an entire day’s work before they even sit in my chair. The issue isn’t a lack of talent or a bad attitude; it’s a fundamental misunderstanding of what their skin represents on a shoot. It’s not just their face; it’s the canvas upon which the photographer’s light, the stylist’s vision, and my artistry must converge. A dry, flaky, irritated, or congested canvas makes my job exponentially harder, wastes precious time, and compromises the final image.
Many models believe that simply showing up without makeup constitutes being prepared. This is a dangerous oversimplification. True preparation is a disciplined protocol. It involves understanding what to do—and more importantly, what not to do—in the 24 hours leading up to call time. It’s about respecting the delicate balance of your skin and the professional integrity of the beauty team’s tools and expertise.
But what if the real key to a successful shoot wasn’t just avoiding last-minute facials or drinking water, but adopting the mindset that your skin is a collaborative asset? This isn’t about generic beauty tips. This is the professional standard. It’s about hygiene, etiquette, and a level of preparation that separates the amateurs from the top-tier talent who are booked again and again.
This guide will break down the non-negotiable protocols. We will cover the precise definition of a “bare face,” how to manage your skin leading up to a shoot, the unwritten rules of conduct in the makeup chair, and the technical reasons behind a makeup artist’s methods. Consider this your new professional mandate.
To navigate these critical professional standards, this article breaks down the essential protocols every model must master. Explore the detailed sections below to understand the rules of engagement, from pre-shoot skin prep to in-chair etiquette and post-shoot care.
Summary: Mastering the Professional Canvas for Photoshoots
- Clean Face vs. Moisturizer: What Exactly Does “Come Bare Faced” Mean?
- How to Disclose Skin Allergies Without Being Labeled “Difficult”?
- Phone Down, Head Up: The Etiquette of the Makeup Station?
- Why You Should Never Touch the Makeup Artist’s Brushes?
- How to Remove Waterproof Stage Makeup Without Damaging Your Skin?
- Extraction Disaster: Why You Should Never Get a Facial 3 Days Before Casting?
- Why Red Lipstick Looks Like Black Holes in Black and White Photography?
- How to Do Your Own “No-Makeup” Makeup for Castings Like a Pro?
Clean Face vs. Moisturizer: What Exactly Does “Come Bare Faced” Mean?
The instruction “come bare-faced” is the most misunderstood directive in the modeling industry. It does not mean arrive with tight, dehydrated skin. It means you must deliver a perfectly clean, hydrated, and non-activated canvas. Your personal moisturizer, and especially anything with SPF, can conflict with the professional-grade products I need to use. The silicones, oils, and film-formers in your products may cause my products to pill, separate, or slide off under hot lights. Your job is to prep, my job is to prime.
A true professional arrives with skin that has been gently cleansed with lukewarm water that morning, patted dry, and nothing else. The night before is when your real work happens. This involves gentle exfoliation (no harsh scrubs), followed by deep hydration with ingredients like hyaluronic acid, and sealed with a simple, fragrance-free moisturizer. This ensures the skin is plump and calm, ready for me to apply a tailored priming solution that works synergistically with the foundation I’ve chosen for the shoot’s specific lighting and camera.
The impact of a professionally prepped canvas is not trivial. It’s a measurable advantage. For instance, Charlotte Tilbury’s “Magic Cream” was developed backstage for this exact purpose—to create a perfect base. Internal data shows that when a professional prep product is used, 93% of users agree makeup looks better and foundation lasts significantly longer. Arriving with a clean slate allows me to build this flawless foundation, saving time and ensuring the best possible result.
Follow this strict timeline for delivering a shoot-ready professional canvas:
- 24 hours before: Gentle exfoliation with a lactic acid or enzyme treatment, followed by a hydrating sheet mask.
- Night before: Apply a hyaluronic acid serum on damp skin and seal it with a simple, fragrance-free moisturizer.
- Morning of shoot: Splash face with lukewarm water only. Pat dry gently with a clean towel. No products.
- 30 minutes before arrival: Apply a simple lip balm to prep the lips. Avoid any active ingredients or SPF on the face.
- Upon arrival: Allow the MUA to assess your skin and apply their tested prep products for optimal compatibility.
How to Disclose Skin Allergies Without Being Labeled “Difficult”?
Clear, professional communication is the cornerstone of a safe and effective makeup application. Disclosing allergies or sensitivities is not being “difficult”—it is a non-negotiable professional responsibility. Failing to do so can result in reactions that not only compromise your health but can also derail a shoot entirely. The key is how and when you communicate this vital information. Do not wait until you are in the chair and I have product on my palette.
The correct protocol is to inform your agent at the time of booking, so they can relay the information to the production team. You should also send a polite, concise email to the lead makeup artist 24-48 hours before the shoot. Frame it professionally: “Just a professional heads-up, I have a known allergy to [Specific Ingredient, e.g., lavender oil or red dyes]. I wanted to let you know in advance to ensure a smooth process on the day.” This shows foresight and respect for the MUA’s preparation process.

On the day of the shoot, gently and briefly reiterate your sensitivities when you first sit down. Have a list of the specific ingredients on your phone if necessary. An experienced MUA will always appreciate this transparency. It allows us to use alternative products or perform a patch test if needed. This is not an inconvenience; it is a standard part of our job. Being proactive and precise transforms a potential problem into a simple, professional checkpoint. You are not being difficult; you are being a responsible collaborator.
Phone Down, Head Up: The Etiquette of the Makeup Station?
The makeup chair is not a waiting room; it is an active work zone. Your position and stillness directly impact the quality and speed of my work. The most common breach of etiquette is looking down at your phone. This single act creates a cascade of problems: it forces your chin down, creating temporary creases on your eyelids and neck; it strains your neck muscles, leading to fidgeting; and it forces me to work at awkward, inefficient angles.
Your head must remain straight and your chin slightly lifted unless I direct you otherwise. This is my workspace. Constant movement, talking during precision applications like eyeliner or lip liner, and eating or drinking are disruptive and increase the risk of mistakes that cost time. The time in the chair is an opportunity for collaboration. Use it to discuss the character, mood, or look with the MUA. This creative exchange is far more valuable than scrolling through social media.
Top-tier MUAs value a calm and focused environment. As makeup artist Dick Page notes, the goal is minimal disruption to keep the skin calm, especially when a model is being handled by multiple people all day. He advises artists, “Don’t bother the skin too much if you want to keep it calm.” This principle of minimal interference extends to the model’s behavior. A still, attentive model allows the MUA to work with precision and a lighter touch, resulting in a more flawless and comfortable application for everyone.
Your Action Plan: Makeup Chair Etiquette
- DO: Keep your head straight and chin slightly lifted for optimal application angles.
- DON’T: Look down at your phone—this creates temporary creases and strains neck muscles.
- DO: Use makeup application time to discuss the character or mood with the MUA.
- DON’T: Eat or drink during application, as it risks spills and unnecessary facial movement.
- DO: Ask before inviting friends or family to observe the process.
- DON’T: Talk excessively during precision work like lip liner or eyeliner application.
Why You Should Never Touch the Makeup Artist’s Brushes?
A makeup artist’s kit is not a collection of products; it is a highly curated, sanitized, and expensive set of professional tools. Touching the brushes is the ultimate violation of set etiquette for two critical reasons: hygiene and investment. My brushes are my livelihood, and maintaining their integrity is a non-negotiable part of my professional practice. Each brush is meticulously cleaned and sanitized between clients to prevent cross-contamination. When you touch a brush, you transfer oils and bacteria from your hands, compromising this hygiene protocol.
This isn’t just a matter of cleanliness; it’s a matter of professional reputation and safety. An outbreak of breakouts or an infection traced back to a set can ruin a career. Professional MUAs rely on systems to maintain sanitation, including rapid-cleaning automated systems, to uphold these standards. Your interference undermines this entire process.

Furthermore, these are not disposable tools. They are a significant financial investment. A single, high-end foundation brush can cost a substantial amount; for example, a professional brush can cost up to $150. A complete set represents thousands of dollars. The oils from your fingers can damage the delicate natural or synthetic bristles, affecting their ability to pick up and deposit product smoothly. You wouldn’t touch a photographer’s lens or a stylist’s one-of-a-kind garment. Afford my tools the same level of professional respect.
How to Remove Waterproof Stage Makeup Without Damaging Your Skin?
The shoot doesn’t end when the camera stops clicking. How you remove heavy, waterproof, or stage makeup is critical for maintaining the health of your skin—your primary professional asset. Aggressive rubbing with wipes or using harsh, alcohol-based removers can cause immediate irritation, redness, and micro-tears in the skin. Arriving at the next day’s shoot with a compromised skin barrier is unprofessional and makes my job harder. The correct method is the professional double cleanse, a technique designed to dissolve makeup without stripping the skin.
This process always begins with an oil-based cleanser or balm applied to *dry* skin. Oil dissolves oil, effectively breaking down the most stubborn waterproof formulas without friction. Massage it in for a full 60 seconds, then add a small amount of water to emulsify the product into a milky texture before rinsing. The second step is a gentle, pH-balanced cream or gel cleanser to remove any remaining residue. This ensures your skin is truly clean but not stripped of its natural moisture.
Makeup removal wipes are the enemy of professional skin. As esteemed makeup artist Frankie Boyd states, they are a last resort, if ever.
I never use wipes on the face. I find them to be surprisingly rough and much too astringent—often they leave the face red and irritated.
– Frankie Boyd, Professional Makeup Artist
After cleansing, you must focus on recovery. A barrier-repairing serum containing ingredients like ceramides or niacinamide is essential to soothe the skin and rebuild its protective layer. This isn’t just skincare; it’s post-performance maintenance for your most valuable asset.
Extraction Disaster: Why You Should Never Get a Facial 3 Days Before Casting?
A last-minute facial with extractions is one of the most damaging things a model can do before a shoot or casting. While the intention might be good—to achieve clear skin—the reality is often a disaster. Extractions, even when performed by a skilled esthetician, cause localized inflammation, redness, and potential scabbing. This trauma to the skin takes several days to heal, and a camera, especially a high-definition one, will pick up every single imperfection. Trying to cover fresh post-extraction marks is a nightmare; makeup can cling to dry patches or fail to adhere to inflamed skin, resulting in a cakey, obvious texture.
The cardinal rule is to schedule any intensive treatments, especially those involving extractions or new active ingredients, at least one to two weeks before any important booking. As a general principle, you should avoid trying new skincare products or treatments right before a photo shoot. Your skin needs time to heal, calm down, and present a smooth, even surface. Introducing unfamiliar products or aggressive procedures creates an unacceptable risk of adverse reactions that can jeopardize a job.
If you feel your skin needs a boost before a shoot, opt for safe, non-invasive alternatives that focus on hydration and calming. These treatments provide an immediate glow without the risk of redness or irritation. Consider these shoot-safe options:
- Oxygen facial: Safe up to 24 hours before a shoot for a plump, hydrated look without irritation.
- LED light therapy: Red light therapy is excellent for reducing inflammation and can be done on the same day.
- Hydrating facial (no extractions): Focus on moisture-infusing masks and calming ingredients.
- Gentle enzyme treatment: For light exfoliation, schedule this a minimum of two days prior.
- Lymphatic drainage massage: Reduces puffiness and promotes a sculpted look without disrupting the skin’s surface.
Why Red Lipstick Looks Like Black Holes in Black and White Photography?
A common point of confusion for models is why a makeup artist might choose a vibrant fuchsia or a deep berry lipstick for a black and white shoot, instead of a classic red. The reason is rooted in the physics of light and film (or digital sensors). Black and white photography does not capture color (hue); it captures luminance—the brightness value of a color. A pure, blue-based red lipstick is extremely low in luminance. When translated to a grayscale image, it renders as a very dark gray, often appearing as a flat, lifeless black void that absorbs all light and detail.
This “black hole” effect completely flattens the lips, erasing their natural shape, dimension, and texture. My job is not just to apply color, but to sculpt with light and shadow. A matte red is the worst offender, as its texture absorbs even more light. To counteract this, a professional MUA working on a B&W shoot will select lip colors with higher luminance values and finishes that reflect light.
This table illustrates how different lipsticks translate into black and white, and why an artist makes specific choices to ensure your features are defined and vibrant, even without color.
| Lipstick Type | B&W Tonal Value | Visual Result | Recommended Alternative |
|---|---|---|---|
| Pure Red (Blue-based) | Very Dark Grey | Appears nearly black | Deep Fuchsia |
| Orange-Red | Dark Grey | Slightly lighter than pure red | Vibrant Coral |
| Matte Red | Darkest (light-absorbing) | Flat, no dimension | Satin Finish |
| Glossy Red | Dark with highlights | Some lip definition | Glossy Pink-Brown |
A satin or glossy finish is also crucial, as it creates highlights that define the curve of the lips, preventing them from looking like a flat cutout. Trusting your MUA’s seemingly counter-intuitive choice is trusting their technical expertise. We are painting with light, not just with color.
Key Takeaways
- Your skin is a professional asset; its preparation in the 24 hours before a shoot is a non-negotiable part of your job.
- Strict hygiene protocols, including never touching an MUA’s tools, are mandatory for preventing contamination and showing professional respect.
- Effective communication about allergies and adherence to in-chair etiquette are signs of a top-tier model that lead to better artistic outcomes and re-bookings.
How to Do Your Own “No-Makeup” Makeup for Castings Like a Pro?
There are times, particularly for castings, when you will be required to do your own “no-makeup” makeup. This is a test. The goal is not to show up with a fully made-up face, but to present a clean, polished, and authentic version of yourself. Casting directors want to see your unique features, your skin texture, and your bone structure. The “no-makeup” look is about strategic enhancement, not visible coverage. Mastering this is a vital skill that demonstrates your understanding of the industry.
The professional approach focuses on perfecting the skin selectively, defining features invisibly, and creating a healthy, natural finish. This means avoiding a full face of foundation at all costs. Instead, use a minimal amount of concealer only where absolutely necessary: around the nostrils to cancel out redness, under the eyes to brighten darkness, and on any specific blemishes. The rest of your skin should be left natural. Shine should be controlled, not eliminated. Use a translucent powder applied with a small, fluffy brush *only* on the T-zone (forehead, nose, and chin).
This level of precision requires the right tools. Research shows that over 60% of professional makeup artists use brushes made with high-precision synthetic bristles for tasks like strategic concealing. Your fingers are not precise enough for this work. Invest in a small set of quality brushes. The final touches are subtle but impactful: tightline the upper waterline with a brown pencil (never black) to define the eyes without a visible line, brush brows upward with clear gel to lift the face, and use a tinted balm that matches your natural lip color for a hint of polish.
The pro technique is about what you *don’t* do: no contour, no heavy brow powder, no winged liner, and no obvious lipstick. It’s you, perfected.
By internalizing these protocols—from pre-shoot prep to on-set etiquette and casting makeup—you are no longer just a model. You are a reliable, knowledgeable, and indispensable professional partner. This is how you build a lasting career.